My family and I are annual pass holders to disneyworld. Our favorite park is animal kingdom; we just love the animals, and the safari, and just walking around. Its by far the most relaxing of the parks for us. I made a mei tai to use with my youngest, Finn, and fell in love with the ease and comfort of them. I knew our next trip to disney I would be using one with him, but for animal kingdom I wanted a cute animal one, with ears...So I decided to make a giraffe mei tai. Then I cam across a blog with a tutorial on how to make a ring tai...It's like a mai tai but uses rings to adjust the fit instead of knots. This seemed to me like it would be cooler in the hot summer months here in Florida. A Giraffe Tai with ears on the hood it is! I'm not going to tell you how to make the ring tai.
<---click there to follow the tutorial. I will however attempt to explain how I did so you can avoid all the seam ripping I did if you make one yourself.
This is the shape I used to make my hood. The width is the width between my straps and then it gets wider and curves at the bottom (which is the part that will be around baby’s forhead) the little triangles are the darts that I stuck the ears into) You’ll need 2 pieces total. ***See the photoshopped squares at the top of the pieces? (I know my photoshop skills are so good you didnt even notice them!) You are going to want to add those to your pattern. They dont have to be super long, but they need to be as wide as you want your hood strap channel thing….
then fold your fabric in half and cut (again..make sure you have a little tab along the outside edge to pull the straps through..Its not in my pictures because I forgot)
mark your dart lines and cut
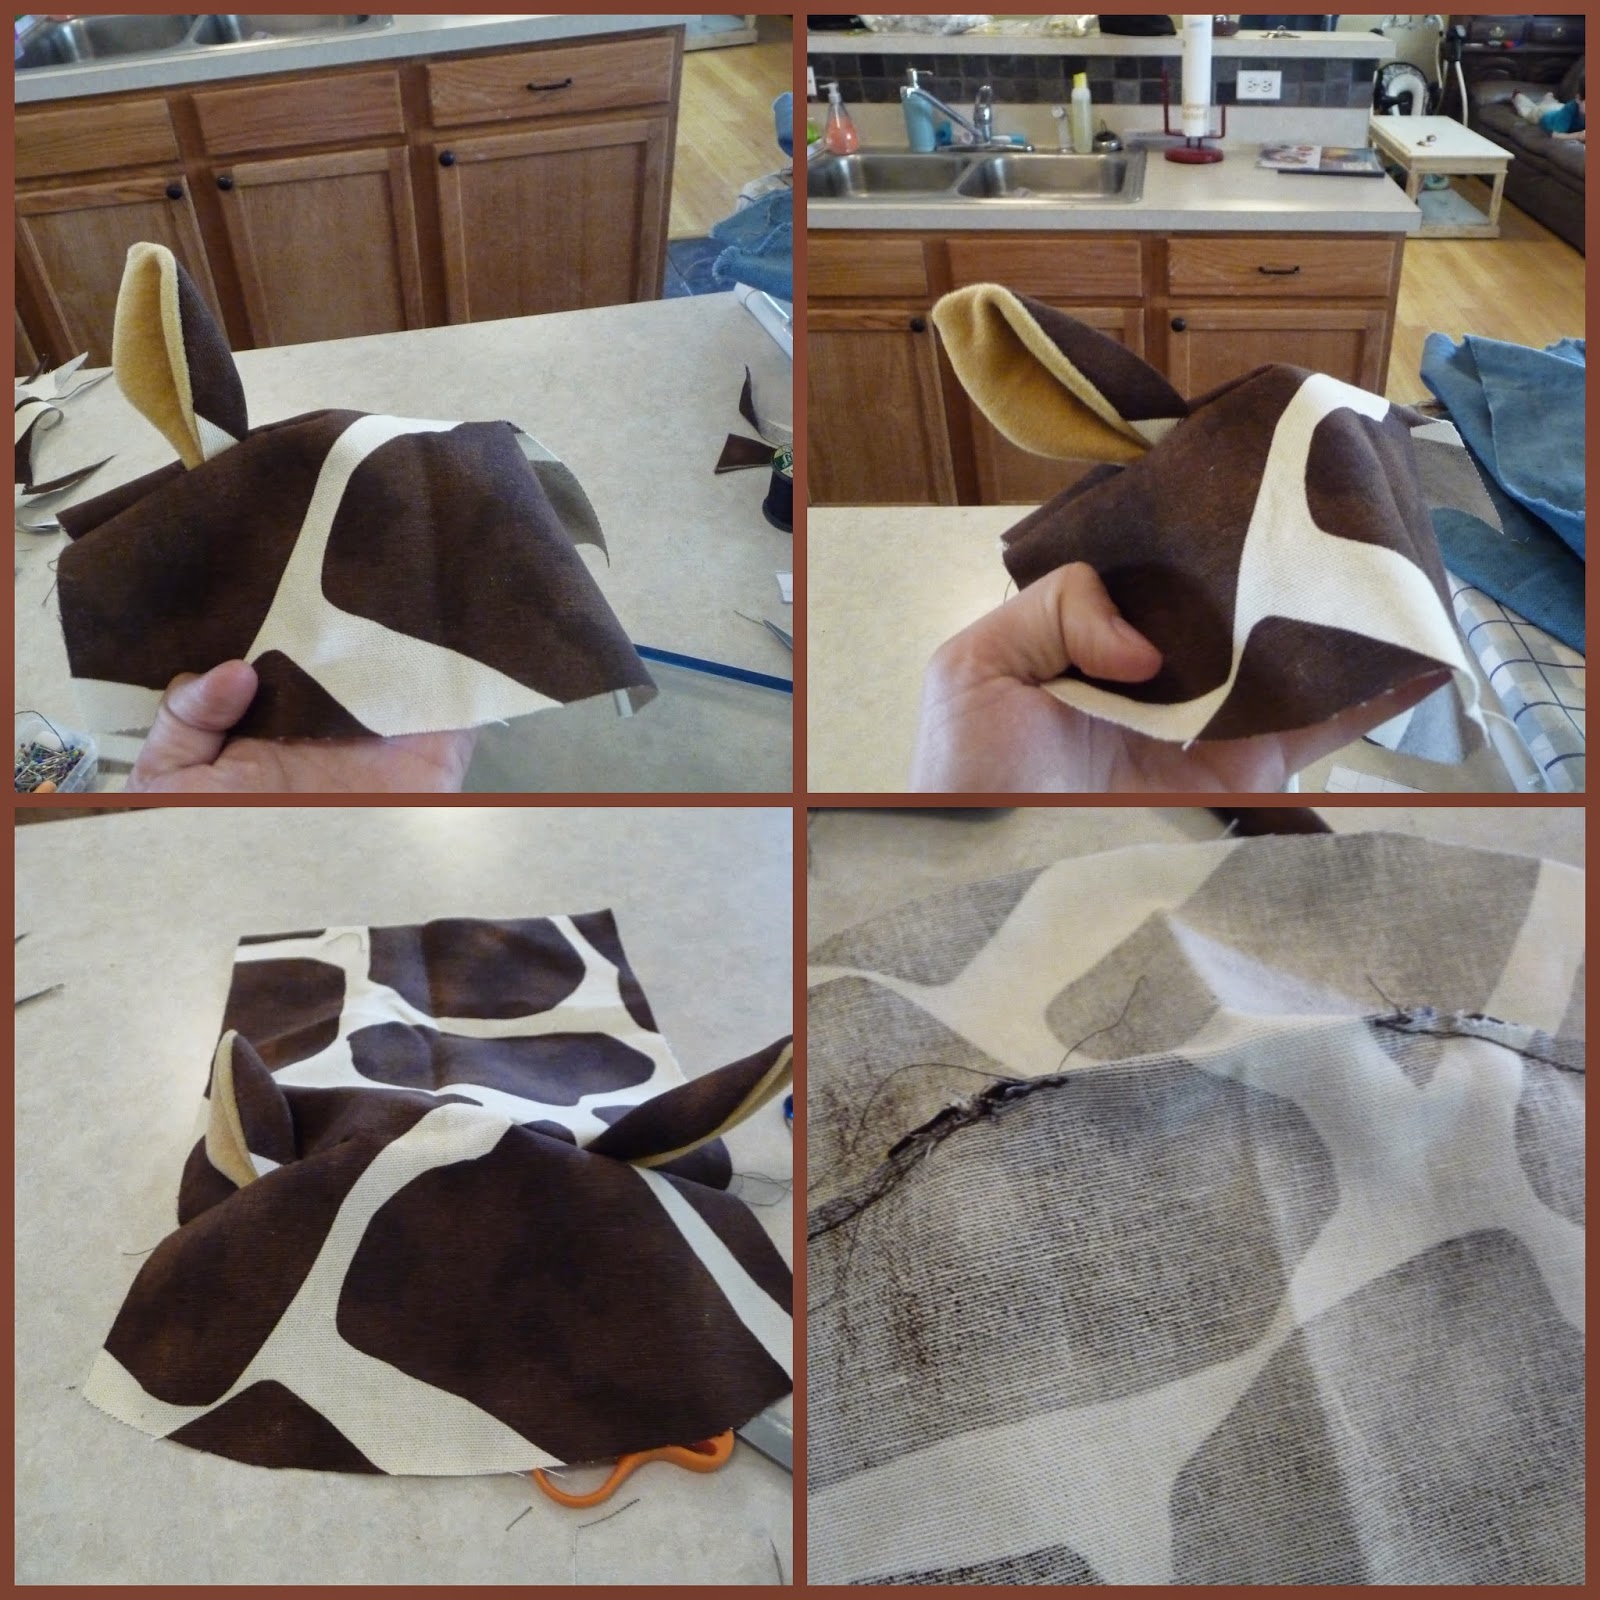
this is the shape I used for the ears and the horn nub things. I cut a front and back and then sewed right sides together and turned and pressed
the ears are going to be stuck into the darts and sewed. So pin in place and sew. I would use a long stitch so its easy to unpick if you dont like the ear placement
the first time I didnt like how upright they work so I picked the stitches and made it flop a bit more (I wish it was even more floppy but I wasnt unpicking anymore stitches). Do both ears and trim the excess
I put a bit of stuffing into the horn nub things. I tried a few different ways to attach these and didnt end up getting any pictures of how I ended up doing it. I turned the raw edges inside so they werent visible and then ironed it. Then I held them in place on top of the hood and whip stiched them by hand in place. I pulled the one side a little away from the other while sewing so they stood upright more. You can see the super uneven hand sewing.
now you can plop it on your baby’s head and kinda see how the finished product will look.
so in my pattern I forgot to make any sort of tab for the pull straps to come through.. I improvised by turning and sewing around an inch (see the orange fabric turned up? thats where the straps will be pulled though so it cant be sewed shut)
pin and sew…don’t do like I did and realize after that there is no where for the hood straps to be pulled through and have to unpick your stitches and have to improvise…also leave the part that is going to be stuck into the carrier unsewed.
turn, iron, and topstitch … Don’t sew the hood strap holes closed. Then sew channels for the straps to run through.
I made 4 straps total, 2 for each side…they are just long strips of fabric however long you want them. Press in half, and then fold edges in and press again. Make sure one end of each looks nice. I folded the end down twice and then refolded long edged in. Then topstitch.
Thread them through the hood…
plop on sleeping baby…
or lay against unfinished carrier..
The only change I made to the tutorial I followed is I added a little padded piece of fabric behind the waist ring:


LOVE THIS! TOO CUTE! Definitely making something similar for my little guy
ReplyDeleteAwesome! I'd love to see pictures when you're done
Delete